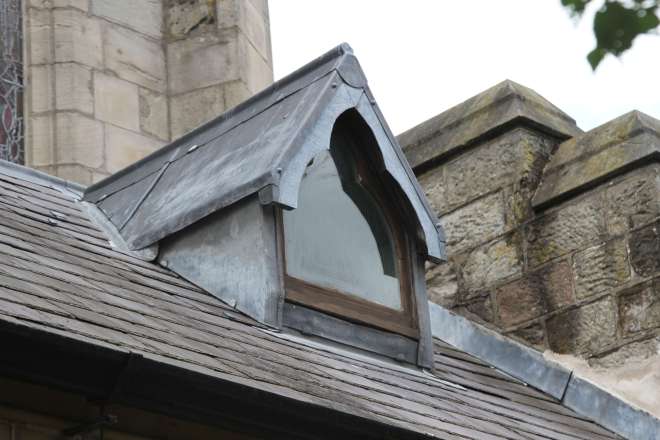
A fairly high proportion of UK homes, including new build homes, incorporate habitable space under the pitched roof. Whilst some use roof windows (flush with the pitch of the roof), some make use of a timber dormer construction. These are often architecturally-attractive, providing a pleasant aesthetic to the exterior of the property. However, these can be thermally challenging. A dormer is typically constructed from two timber framed dormer cheeks providing lightweight walls extending from the roof timbers, and either a flat roof or a pitched gable roof above.
When the main walls are thermally improved with external wall insulation, internal wall insulation or cavity wall insulation, very often the dormer is unchanged. It can leave the dormer constructions as the worst heat loss zones in the property, especially if insulation is lacking to start off with. There is generally very little space in the dormer cheeks to simply add internal insulation since the window opening often dictates the position of the internal surfaces. Adding external wall insulation is complicated and might not be practical and it will alter the external aesthetics. The ceiling in the dormer cannot easily be lowered to add a layer of insulation because of the position of the top of the window being generally flush with the existing ceiling. There may not be space in the roof to install loft insulation. Some pitched roof dormers are inaccessible from the main loft to inspect or add in additional insulation.
Experience with a recent (20-year-old) construction revealed
- no insulation above the ceiling plasterboard (above was an empty ventilated cavity to the roofing felt and tiles)
- ill-fitting and loose thin polystyrene boards in the dormer cheeks, open to the outside air
- the outer surfaces of both the ceiling plasterboard and the side plasterboard had external air flowing directly behind them
- the dormer allowed cold bridging of the adjacent between-rafter and under-rafter insulation in the main section of the roof
- evidence of damp issues and some black mould growth behind the panels (and evidence of regular condensation on the internal paintwork)
- winter wall temperatures would be as low as +2 degrees Celsius above the external air temperatures
- stifling summer temperatures from a combination of lacking insulation and direct solar heating (insolation) on the external surfaces
Fortunately the timbers were in excellent condition and needed no treatment or repair.
In the first instance, providing an air tight barrier and new high efficiency insulation massively improved the warmth. It is particularly important to select insulation materials with high thermal resistance since space is at a premium in a dormer construction. This is where foil-faced phenolic panels combined with high-performing multi-foil insulation gives the best U-values in the available space. Here foil-faced phenolic panels were cut to fit snugly between the timber beams and cold bridging was reduced with a multi-foil insulation stapled and taped over the timbers. Allowing for air gaps between the insulation layers improves the performance of the insulation. Insulated plasterboard is available in different thicknesses and could be an alternative option to using multi-foil, although multi-foil gives a good vapour barrier when overlapped and taped. For this construction multi-foil gives a slight space saving over the insulated plasterboard for the same U-value. If space is at an absolute premium, bespoke vacuum sealed panels could be specified for the ultimate thermal efficiency.

The original paintwork showed evidence of condensation. The surface itself was very cold in winter, measuring only a few degrees warmer than outside. 
On removal of the original plasterboard the polystyrene insulation was evidently poorly fitting with large gaps in every section 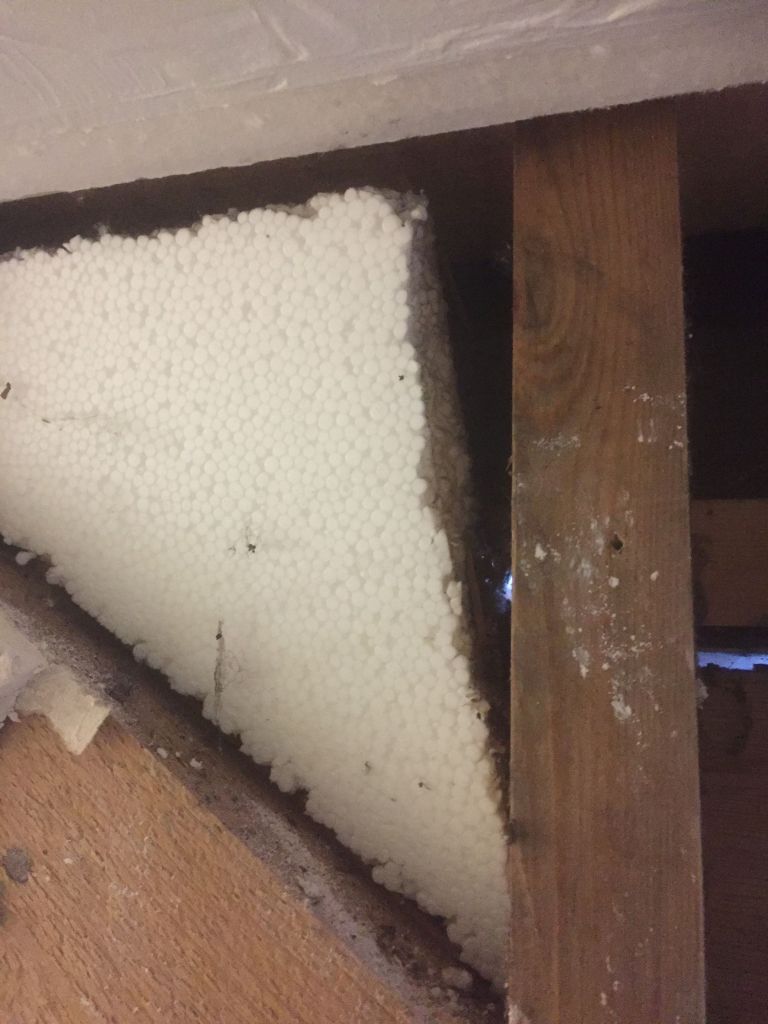
Detail of the ill-fitting polystyrene insulation showing large gaps around the insulation and clear view to outside. Outside air was wetting the reverse of the plasterboard. 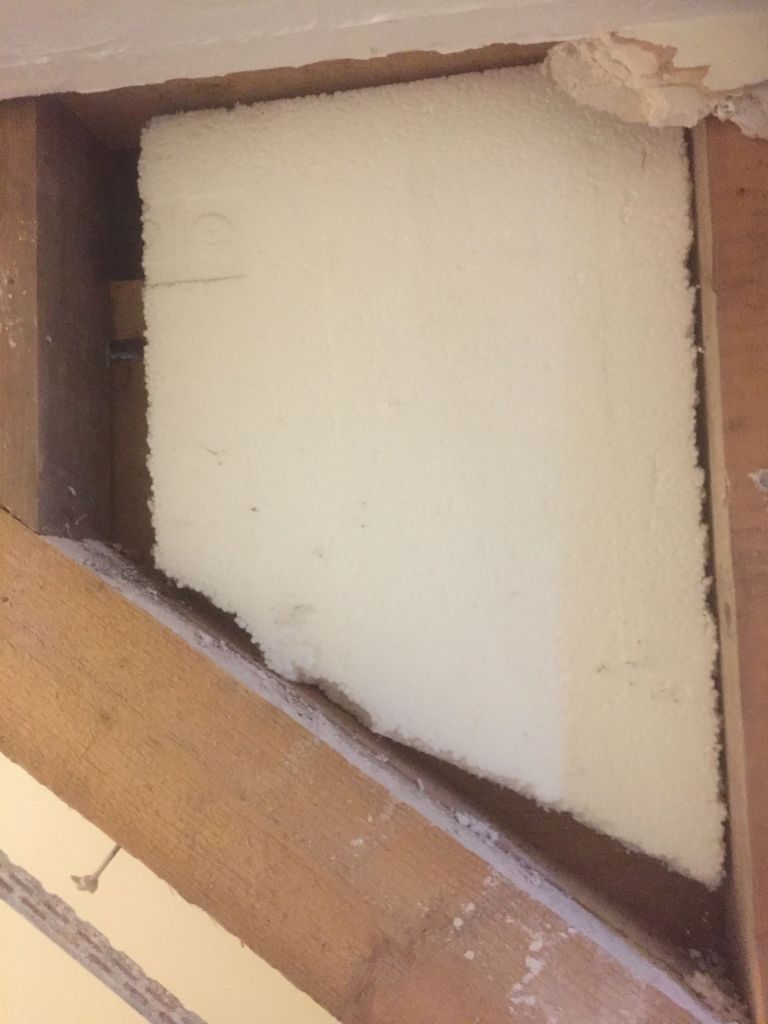
More detail of the ill-fitting polystyrene. Air currents were strong and leaf and seed debris were also present in the dormer cheeks. 
Once the ceiling plasterboard was removed there was no insulation above to the felt. Tile removal and application of new breather quilt helped with temperature control in the ventilated cavity. 
Application of foil-faced phenolic panels above and on the sides provided the main insulation. 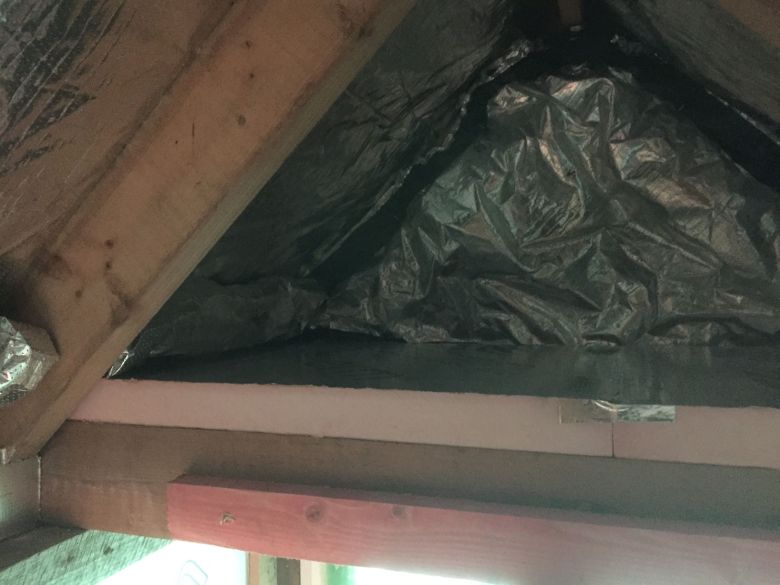
The ventilated roof cavity is seen here showing the top of the foil-faced panels from above. 
Detail of the dormer cheeks with foil-faced phenolic insulation panels inset between the timbers. 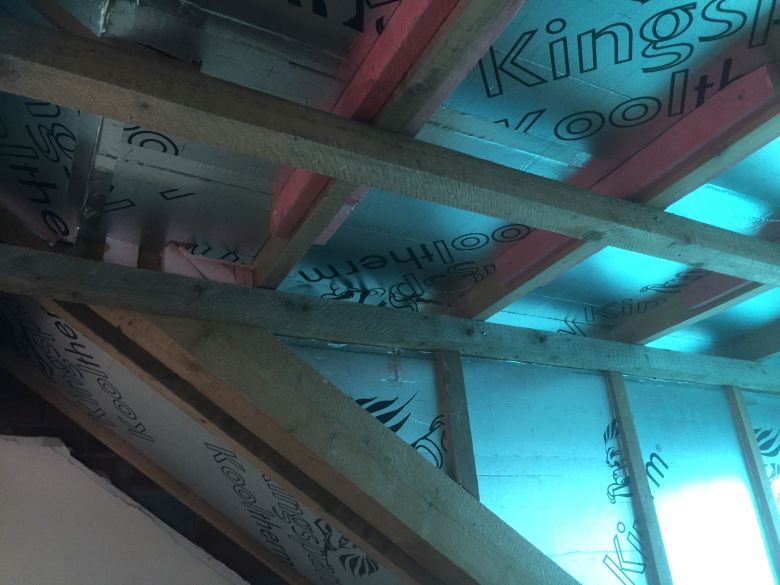
Another detail of the foil-faced insulation from inside the dormer. 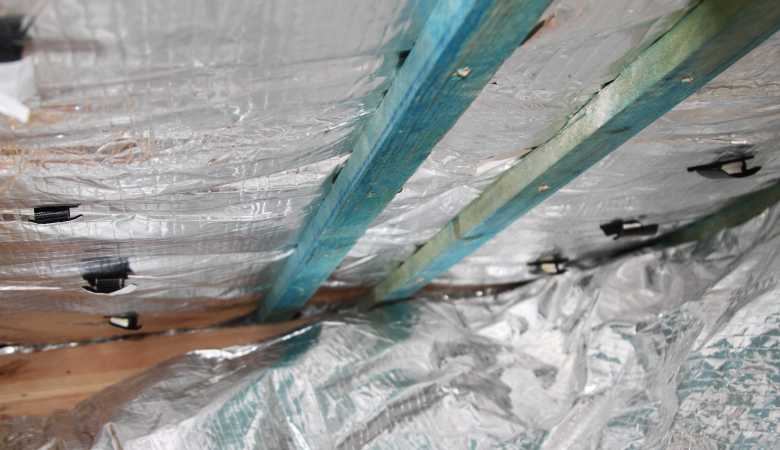
Adding a high-performance multi-foil after an air gap provides a vapour barrier and protects against cold bridging. Optionally, a second layer could be added if there is space. Maintaining the air gap between panels and foil and between foil was achieved by hook and loop wrapped plastic blocks to virtually eliminate thermal conduction. 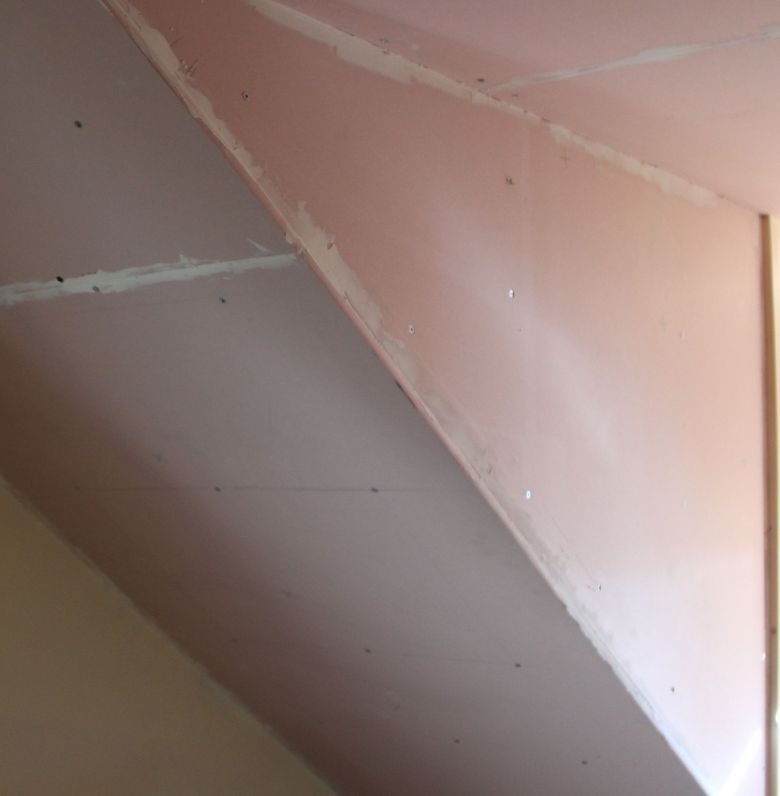
Completion of the dormer used fire resistant plasterboard. Finishing can be by plastering and painting. This one was finished with wooden panelling.
In terms of project complexity, careful insulation of a dormer is one of the more challenging activities covered in this series. It is only really suitable for people with advanced DIY skills or for contracting the project to a competent specialist. The complexity may mean that the project costs could be high. Attention to detail is needed to prevent cold bridging or poorly fitting panels. However, if it is done well then it can really make a positive difference to the room. In the example above, the heat loss was reduced to such a low level (low U-values) that a radiator under the dormer was no longer required and could be removed.
Top Tip: internal surfaces that show condensation in winter are highlighting cold walls where heat loss is high. When the surface drops to below the dew point, water vapour in the internal air will condense out on the coldest surfaces leaving water drops, drips or damp wall surfaces. This can indicate areas where insulation is missing or patchy or identify cold-bridging zones in the construction. Don’t ignore condensation areas since they can lead to mould growth. Increased condensation may also indicate high indoor humidity levels from cooking, showering/bathing or indoor clothes drying. Improved ventilation is often part of the solution to carry high humidity air out of the property and to maintain healthy air quality.
Useful References
